

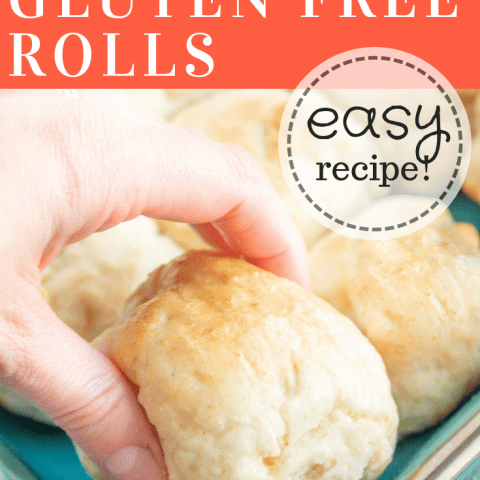
These gluten free rolls are perfectly soft, fluffy and so easy to make! Ready in just one hour, they are the perfect addition to any meal and will be enjoyed by everyone, gluten-eaters included! Dairy free option.
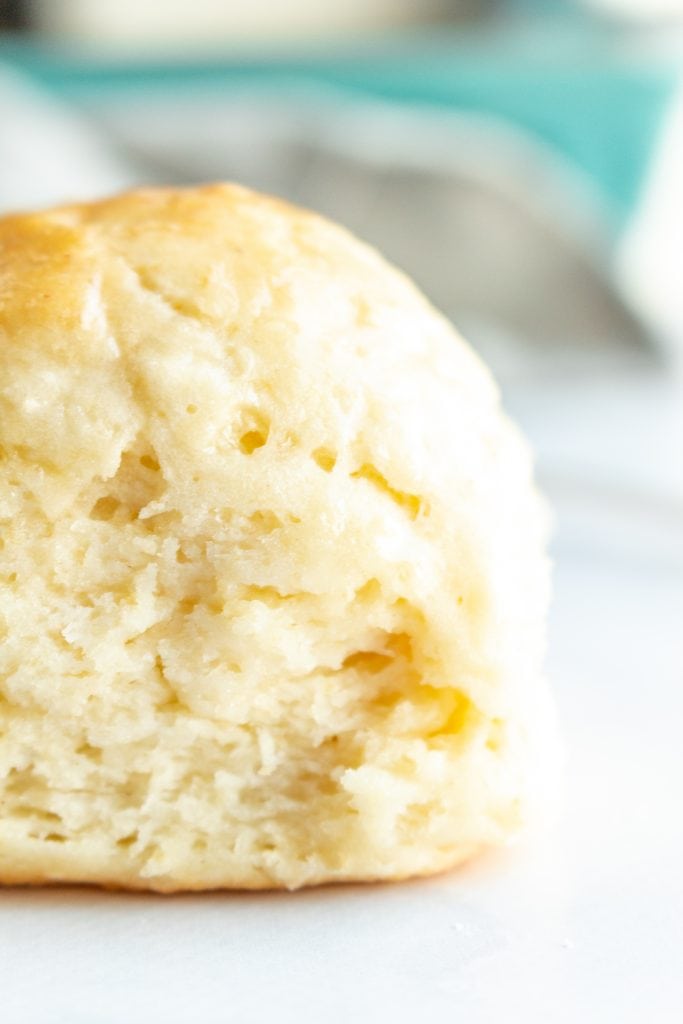
Missing soft, pillowy rolls? I got you! These gluten free rolls don't taste gluten free and are also super easy to make #win. These really are the best gluten-free dinner rolls I know you're going to love them!
With this roll recipe, you won't need 5 different flours or ingredients you can't pronounce. It's a simple recipe that uses only a handful of ingredients and takes just over an hour, start to finish.
Did you know I have an entire cookbook that teaches you how to make great-tasting gluten free bread at home, and includes over 30 recipes? You can find it on Amazon or download a digital copy here
IS THIS YOUR FIRST TIME MAKING GLUTEN FREE BREAD ROLLS?
The process for making a gluten free yeast rolls recipe is quite a bit different than when you're baking traditional dinner rolls.
I still remember the first time I attempted gluten-free dinner rolls and just swapped a gluten free flour blend in a regular recipe. They balls of dough kinda resembled hocky pucks, didn't rise at all and ended up in the trash.
I just about cried because the flour was so expensive and it was such a disaster, and I want you to have a better experience!
I have a full post on How to Make Gluten Free Rolls, but here are the basics to making homemade gluten-free rolls:
- Extra liquid. Because gluten-free flour absorbs more moisture than wheat flour, you'll need extra liquid. This is key and insures that you have a soft, light, and squishy roll that isn't hard or dense or crumbly. This means that you'll have an extra wet and sticky dough.
- No kneading. Yep, you read that right! Gluten is what creates elasticity in baked goods, and is honestly a little needy. It requires a certain amount of kneading in order to create the right texture. The good news is, we're not using gluten! Instead, you'll be using a gf flour that contains xanthan gum which acts as a replacement and requires no effort on your part. You'll simply add all the ingredients to a bowl, mix, and move on to the next step.
- One rise instead of two. Because we aren't using gluten, the dough actually rises better with just one rise.
- Use a paddle attachment instead of the dough hook if using a stand mixer. Remember that we're adding extra liquid to make this a wet dough? It's more the consistency of a thick banana bread batter than a regular yeast dough so the paddle attachment works perfectly. Don't worry, the rolls come out just like regular rolls!
INGREDIENTS IN GLUTEN-FREE ROLLS
Amounts and full instructions are found in the recipe card below.
You might have seen a gluten free bread rolls recipe that calls for things like apple cider vinegar and baking powder, but I've found that with the right gluten-free flour these aren't necessary.
- Gluten-free flour blend that works well with bread recipes (more on that below) I always use gfJules all purpose flour because it makes the fluffiest rolls every time but there are a couple other options.
- Instant potato flakes NOT potato flour, the instant mashed potatoes. Be sure it is unflavored. If you don't tolerate potatoes or just don't have any on hand, you can leave this out, although it does improve the texture.
- Gluten free instant yeast be sure it's at room temperature and be aware that some yeast is not gf so be sure to check labels! You can use active dry yeast, but it will increase the rise time.
- Sugar or you can substitute honey if you prefer.
- Salt I use salted. If using unsalted butter, increase the salt by ¼ teaspoon.
- Powdered milk gives gluten free bread rolls a rich flavor and helps with browning. I've found that whole milk like this one gives the best flavor. If you're dairy free, you can substitute powdered coconut milk or leave it out.
- Butter, softened. You can use a vegan butter for dairy for dairy-free rolls. Melt brand is my favorite brand and I suggest you use the stick variety.
- Egg helps with texture and rise. To make this recipe egg-free you can use an egg replacer. I've had good success with Bob's Red Mill egg replacer.
- Warm water just warmer than room temperature
- Psyllium husk powder is totally optional, but I've found that it does improve the texture and add it when I have some on hand.

HOW TO MAKE GLUTEN FREE ROLLS
You'll be surprised at how easy it is to make gluten free dinner rolls! They are actually a lot easier than traditional wheat rolls and taste every bit as good. Here are the basic steps:
Step 1: Add Ingredients
To the bowl of a stand mixer fitted with the paddle attachment, add all your dry ingredients, then wet ingredients.
PRO TIP: I've been told that a hand mixer also works, if you don't have a stand mixer. Use an extra large mixing bowl so the dough isn't as tall and doesn't creep up the beaters.
Step 2: Mix
Start mixing on low to combine, then bump up to medium speed and beat for 3-4 minutes.
PRO TIP: Altitude, humidity, how you measure the flour, and other factors can affect the texture of your dough. The batter should be the consistency of a thick banana batter when you're done mixing, definitely too sticky to be worked with your bare hands. If it seems too thick, add a couple tablespoons of water. If it seems too thin, add extra flour a tablespoon at a time.
Step 3: Shape Dough
Shape into rolls by scooping the gluten-free dough with an ice cream scoop or large cookie scoop into a greased 9X13" baking pan, or divide the dough into 12 equal pieces and form each dough ball with your hands. For best results, coat your hands in tapioca starch, water, or a little oil to keep the dough from sticking.
PRO TIP: using food-grade gloves keeps your hands clean and reduces stickiness.
Step 4: Rise Dough
Loosely cover the pan with a light, clean kitchen towel or plastic wrap and let the dough rise in a warm place for 30-60 minutes. I use the proof setting on my oven and they're ready to bake in about 40 minutes.
PRO TIP: If you don't have a proof setting on your oven, you can heat your oven to the lowest temp (usually 170 degrees F), then turn it off. Open the door for a minute to slightly reduce the temperature, put your pan inside, and close the door.
Step 5: Bake
When the rolls have doubled in size, gently brush tops of the rolls with an egg wash (you can omit this step if you want, but they won't brown as well) and bake until they are a light golden brown on top and done throughout.
NOTE that if you've made adjustments to the recipe such as skipping the egg wash and/or omitting the milk powder, the rolls might not brown much.
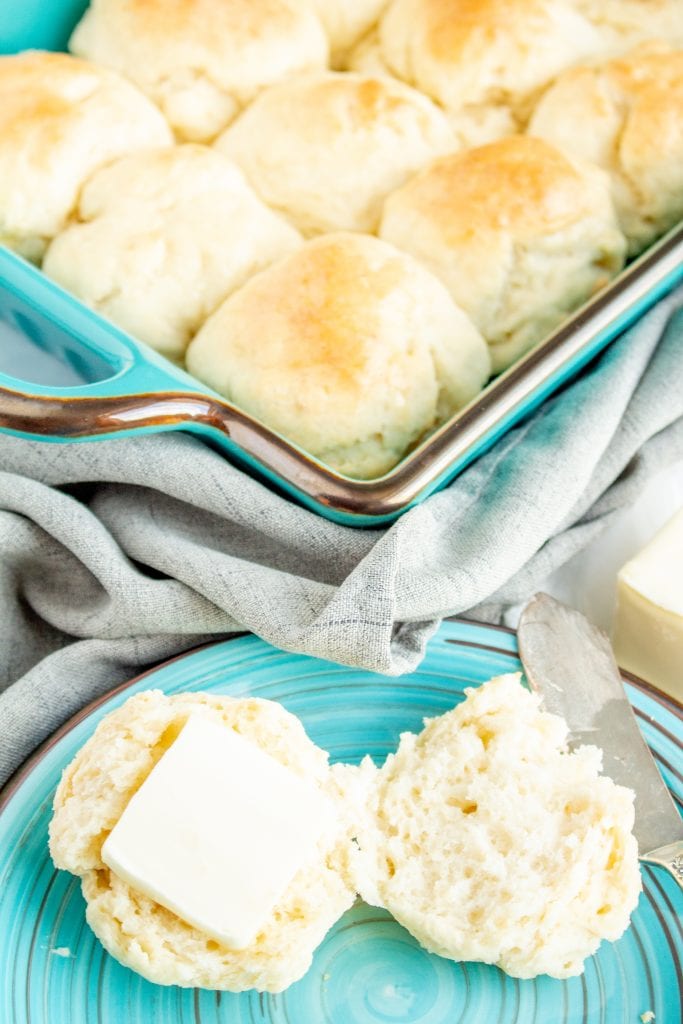
As soon as you remove the rolls from the oven, brush with melted butter or a dairy free substitute.
Like anything homemade, these gluten free rolls are best served warm. We serve them with almost every holiday meal, especially Thanksgiving dinner.
They work great as gluten free sandwich rolls with lunch meat, leftover turkey, or any chicken salad.
Looking for more gluten-free bread recipes? You'll love my gluten free crescent rolls, gluten free sandwich bread, and a festive reader-request, gluten free Julekake
GLUTEN-FREE BAKING TIPS
- Always use the stir, scoop, and level method when measuring flour. Stir the flour, then using a spoon scoop into your measuring cup so it is heaping above the rim. Be careful to not pack it down at all. Use a leveler or the flat edge of a knife to scrape the top of the measuring cup, which will level off the flour.
- Use the gluten-free flour blend recommended in the recipe. There are a wide variety of gluten-free flours that all behave differently, especially for gluten free bread recipes.
- Read through all the notes. I regularly get complaints about the length of my recipe posts and let me tell ya, I could complain about the time it takes me to write them haha! (several hours, plus recipe testing, photography, etc). This isn't a blog, I don't share stories and fill it with fluff. But I DO pack this post with information and instructions that will set you up for success when you're baking gluten-free recipes.
GLUTEN FREE DAIRY FREE ROLLS RECIPE
To make gluten-free dairy-free rolls, use gfJules all-purpose flour blend, powdered coconut milk, and a dairy-free butter substitute (my favorite is Melt)
GLUTEN FREE VEGAN DINNER ROLLS
To make gluten-free vegan dinner rolls, use gfJules all-purpose flour blend, powdered coconut milk, and a dairy-free butter substitute (my favorite is Melt) and Bob's Red Mill egg replacer. Skip the egg wash.
HOW TO MAKE GLUTEN FREE BREAD ROLLS RECIPE AHEAD OF TIME
There are a few ways to make this gluten free bread rolls recipe ahead of time:
- Prepare the dough as outlined in the instructions, shape, place in the pan and cover loosely with plastic wrap, then store in the fridge for up to 24 hours. Bring to room temp and allow to double in size before baking as directed.
- Prepare the dough as outlined in the instructions, shape, and place on a parchment lined baking sheet so that they rolls do not touch. Freeze until solid, then transfer to a Freezer Ziploc bag and store in the freezer for up to 2 months. When you're ready to bake, transfer the balls of dough to a greased 9X13" baking pan, cover loosely with a clean kitchen towel or plastic wrap, and allow to thaw and rise to double in size. This will take several hours, so plan accordingly. Bake as directed.
These gluten-free rolls taste so good alongside any meal, and also make excellent sandwiches! They are soft and fluffy and remind me a bit of Texas Roadhouse rolls, and would pair perfectly with a nice Smoked Ribeye
FREQUENTLY ASKED QUESTIONS
What is the best gluten free flour to make bread with?
How do I make gluten-free rolls without eggs?
How long do gluten free dinner rolls last?
HOW TO SERVE THIS GLUTEN FREE BREAD ROLLS RECIPE
You can enjoy these gluten free dinner rolls any way you would serve traditional rolls!
They're absolutely perfect with a bowl of Kale and Quinoa Chili or served alongside these Instant Pot Mashed Potatoes and creamy Gluten Free Gravy.
If you're looking for a fun and easy variation, one reader said she adds spices and raisins, then tops with a thick cream cheese frosting to make hot cross buns. We think that's a great idea! You can read the full comment from Suzy in the comment section below.
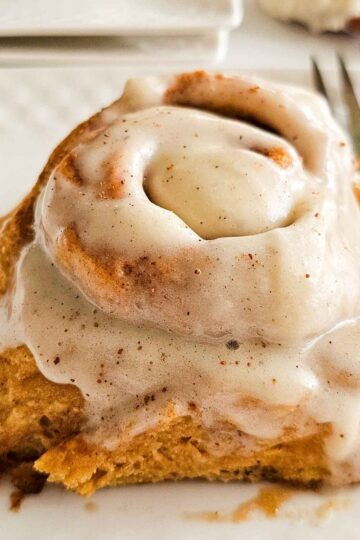
Another reader used the dough to make cinnamon rolls.
This is our go-to gluten free bread rolls recipe to serve for holiday gatherings!
With gluten free yeast breads and rolls, you don't need a second rise. So mix up the dough, shape, rise, and bake. BAM. ready in an hour flat. Be sure to read the directions closely as we include tips and tricks to help make this recipe a success. Keep in mind that we live at an altitude of about 4,000 feet, so you might need to adjust water or flour amounts a smidge based on your altitude.
We hope that you enjoy these fluffy gluten free rolls for holidays and many other meals!
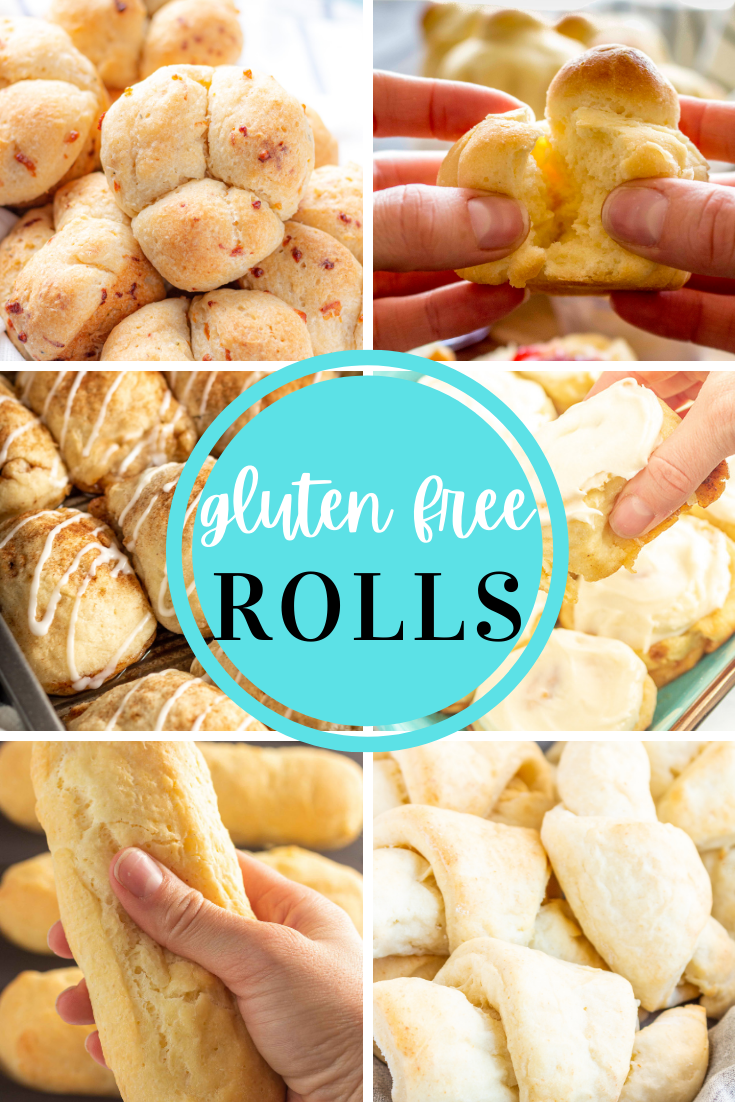
GLUTEN FREE BREAD ROLLS RECIPE
MAKING THIS RECIPE??? snap a photo, and tag @LifeAfterWheat on social media – we love seeing what you make!
Gluten Free Rolls (dairy free option)
https://thereislifeafterwheat.comIngredients
- 3 cups high quality gluten free flour see notes
- 1 tablespoons potato flakes NOT potato flour
- 1 tablespoon gluten free instant yeast room temperature
- 3 tablespoon sugar
- 1 teaspoon salt
- ⅓ cup powdered milk see notes for dairy free
- 1 tablespoon psyllium husk powder optional, see notes
- ¼ cup butter softened (see notes for dairy free)
- 1 egg
- 1 ½ cups warm water just warmer than room temperature
Equipment
Method
- Grease a 9X13 inch baking pan with cooking spray, butter, or a dairy-free butter alternative such as Melt.
- Add all ingredients to the bowl of a stand mixer in order listed.
- Mix on low until ingredients start to combine, then on medium for 3-4 minutes. The mixture will be thick to start and then soften after a minute or so. The dough should be sticky and softer than regular roll dough, more like a thick banana bread.
- If it is too dry (not sticky, easily handled, or crumbly), add a tablespoon or two of water. Likewise, if it is too wet (more like banana bread, not able to be formed or handled at all in the next step), add a tablespoon or two of flour.
- Shape into rolls by scooping the gluten-free dough with an ice cream scoop or large cookie scoop into a greased 9X13″ baking pan, or divide the dough into 12 equal pieces and form each dough ball with your hands. For best results, coat your hands in tapioca starch, water, or a little oil to keep the dough from sticking.
- Loosely cover the pan with a light, clean kitchen towel or plastic wrap and let the dough rise in a warm place for 30-60 minutes. I use the proof setting on my oven and they’re ready to bake in about 40 minutes. I heat the oven to 120 degrees, then turn it off before putting the rolls in to rise. You can also turn the oven on to 350 to preheat and set the pan of rolls on top of the stove.
- When the rolls have doubled in size, brush them gently with an egg wash made of 1 egg + 1 tablespoon of water whisked together. You won't use all of it.
- bake at 350 degrees F and bake for 17-20 minutes, until golden brown on top and done inside. If you omitted the dry milk powder and/or skipped the egg wash, the rolls might not brown as much so check the inside if they aren't browned by 20 minutes.
- Remove from the oven and brush with melted butter. These rolls are best served warm but we put the leftovers in a Ziploc bag and they were still soft the next day.
- This recipe freezes well.

Lori says
Made this for thanksgiving dinner. The taste was good but they came out looking grey and square. What did I do wrong. Would like to try again.
Celeste Noland says
Happy to help you troubleshoot Lor, what flour did you use?
Michelle Benson says
Very happy with these- thanks for sharing! Easy to bring these together and they have a great texture and flavor! I used cup for cup gf flour. Felt like these could truly pass for none gf folks.
David says
Made these using all fresh ingredients and following recipe to a T. Unfortunately, they did not double in size during rise period and they looked nothing like the rolls in the photo. After baking, mine were a dull gray color, very dense and doughy and yeasty smelling/tasting with a hard outer crust that did not brown properly either. I used King Arthur GF measure for measure flour that I use to make excellent chocolate chip cookies, but maybe it’s not as good for bread/rolls. Who knows, really disappointed!
Celeste Noland says
King Arthur actually says on the packaging it doesn't work well for yeast breads, and the flour you use makes a huge difference! I suggest using gfJules brand, or my homemade blend.
Debbie says
Can I use powdered buttermilk for this recipe?
Celeste Noland says
I recommend using powdered instant milk.