
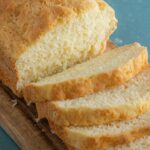
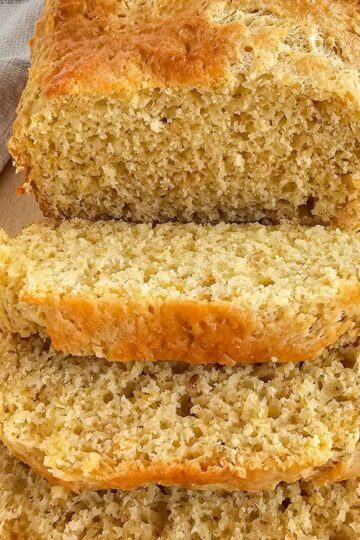
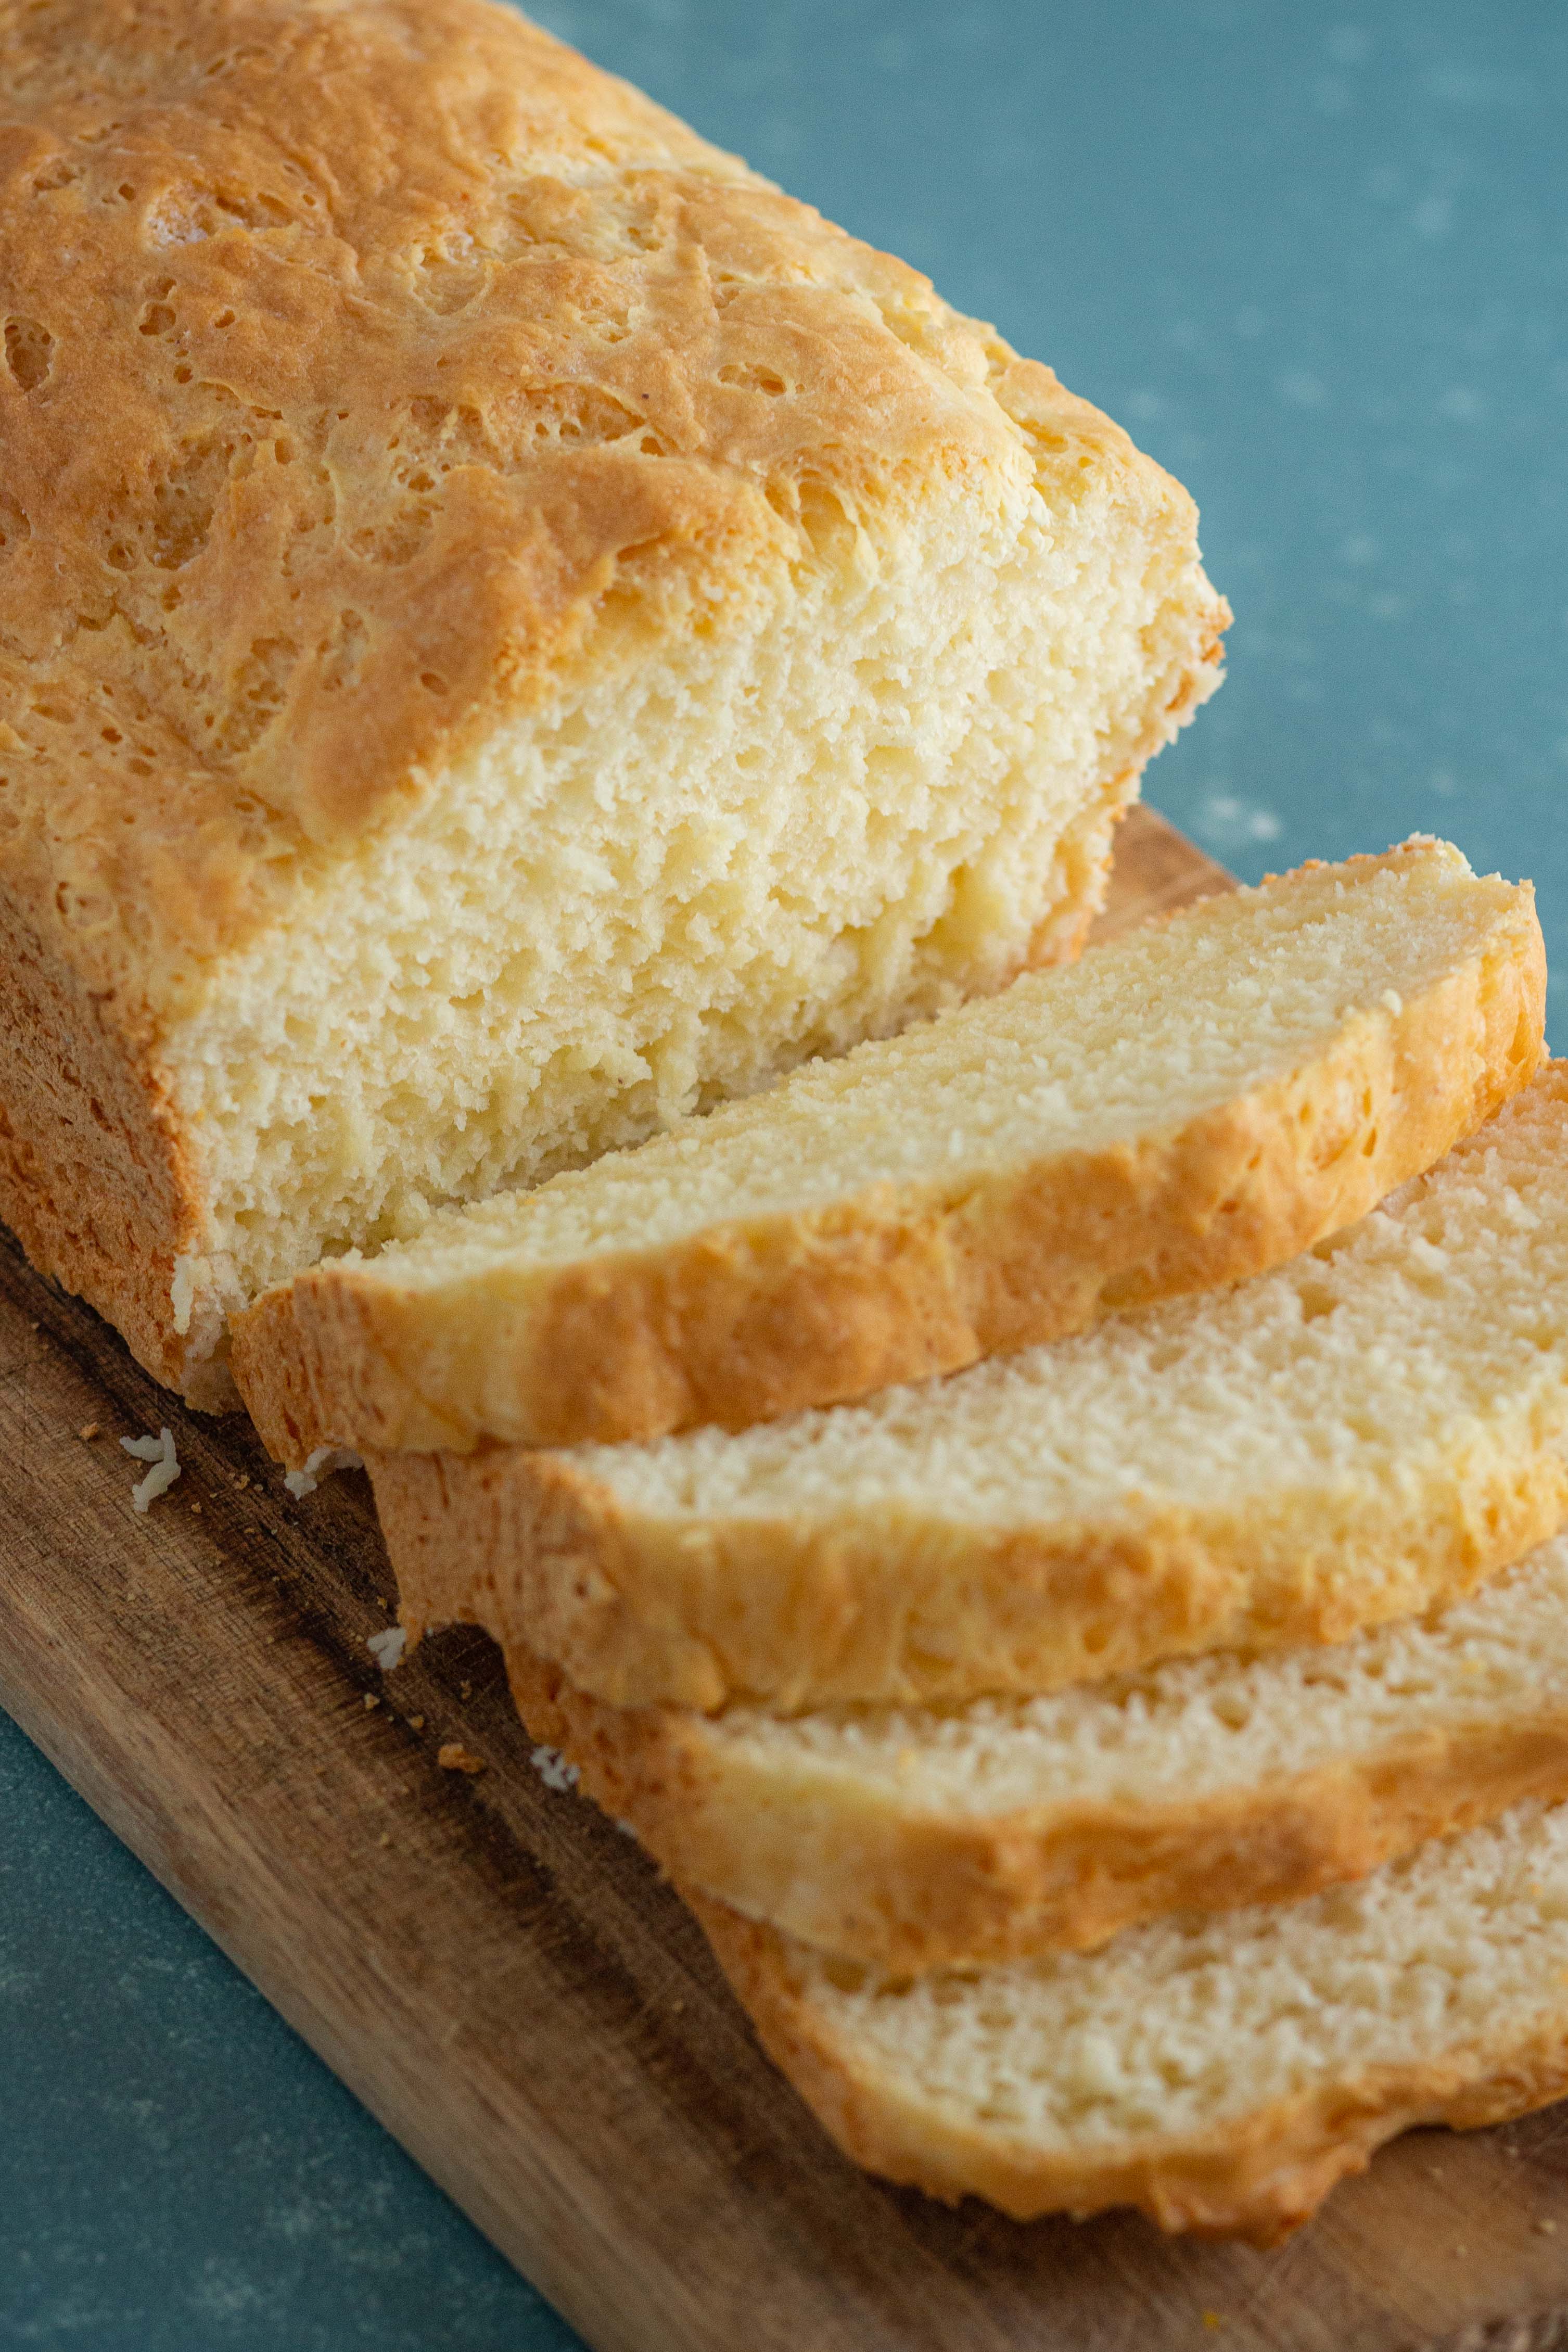
Nothing beats soft and fluffy gluten free bread fresh out of the oven! Stop settling for crumbly, tasteless bread and learn how easy it is to make your own with no kneading and only one rise.
Updated 1.30.2024 Same recipe, more comprehensive instructions 🙂
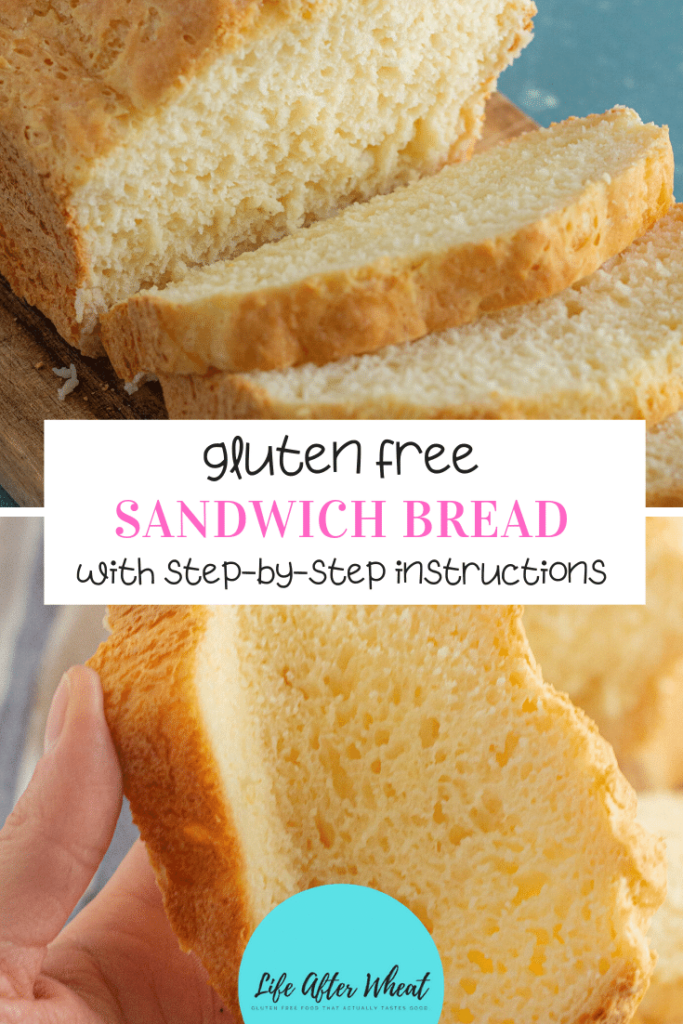
Have you been missing full-sized slices of soft, bendable, bread? If the answer is yes, then this gluten-free bread recipe is for you!
We've tried many a store bought variety, but they can be spendy and many don't even taste very good (but you can check out our list of favorite gluten free bread brands here)
I grew up on homemade bread and was so disappointed with the store-bought options for gluten-free bread, so I knew I had to create my own recipe that would taste good enough for our whole family to enjoy it.
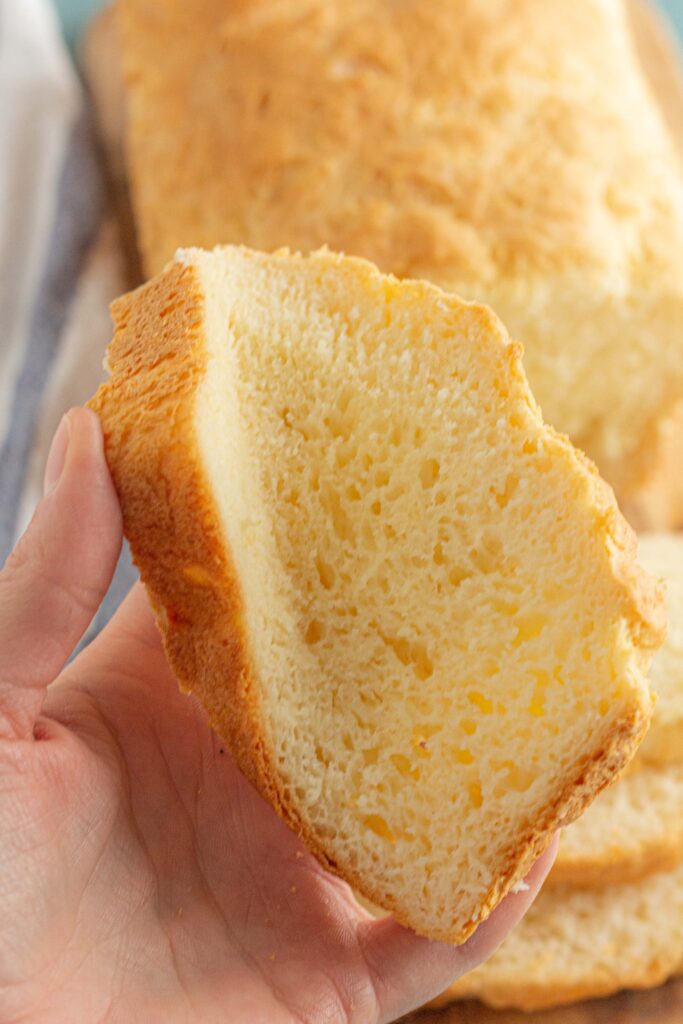
It took some effort and tweaking over the years, but I'm happy to report that my gluten-eating kids devour this bread when it comes out of the oven! It is soft and bendable and has the same flavor as a regular homemade loaf of bread.
You're going to LOVE how easy it is to make, too!
WHAT MAKES THIS THE BEST GLUTEN FREE BREAD RECIPE?
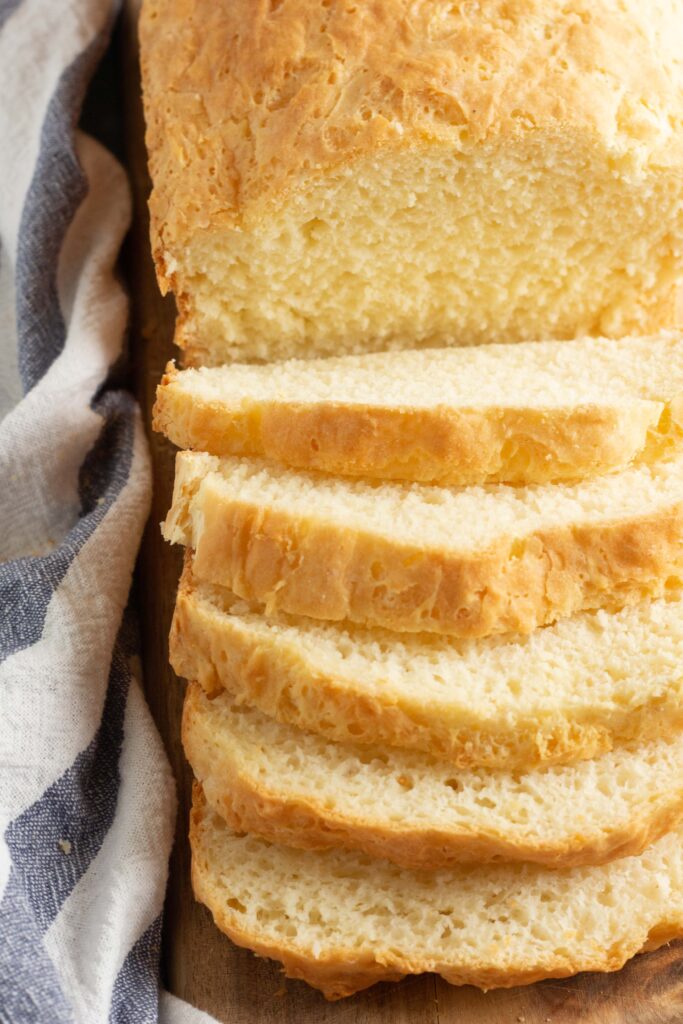
This gluten free sandwich bread isn't grainy or crumbly or gummy. It is soft and fluffy and has that yummy freshly-baked smell and taste.
You'll also love that it's easier to make than regular bread! With no kneading and only 1 rise, you'll be enjoying fresh-baked gluten-free bread in no time.
I did my best to replicate the recipe my husband's grandma passed along to me, and he agrees that this bread tastes just like hers. A decade later, we still bake a loaf almost every week.
You can use this gluten free bread any way that you would normally use bread. makes great sandwiches, grilled cheese, and french toast!
MY FAVORITE BREAD PAN FOR BAKING HOMEMADE GLUTEN-FREE BREAD
I sometimes use my Norpro 12 Inch Nonstick Bread Pan and others I use a standard size loaf pan. It really depends on what size you want your slices 🙂
WHICH GLUTEN FREE FLOUR WORKS WELL FOR BREAD?
A mixture of gluten-free flours and starches, combined with xanthan gum, work the best for gluten-free bread.
I use a gluten free flour mix that I developed which is very easy, inexpensive, and more nutritious than many pre-made blends you would find at the store. The recipe includes 3 different batch sizes and if you use the small batch it's just the right amount for this recipe.
I make a point of testing all the gluten free recipes on this site with a variety of gluten free flours so that I can share what has worked and what hasn't.
If you would like to use a pre-made blend, gfJules works the very best. It makes the softest bread with the highest rise! Better Batter is also an option, but I find it doesn't rise as much.
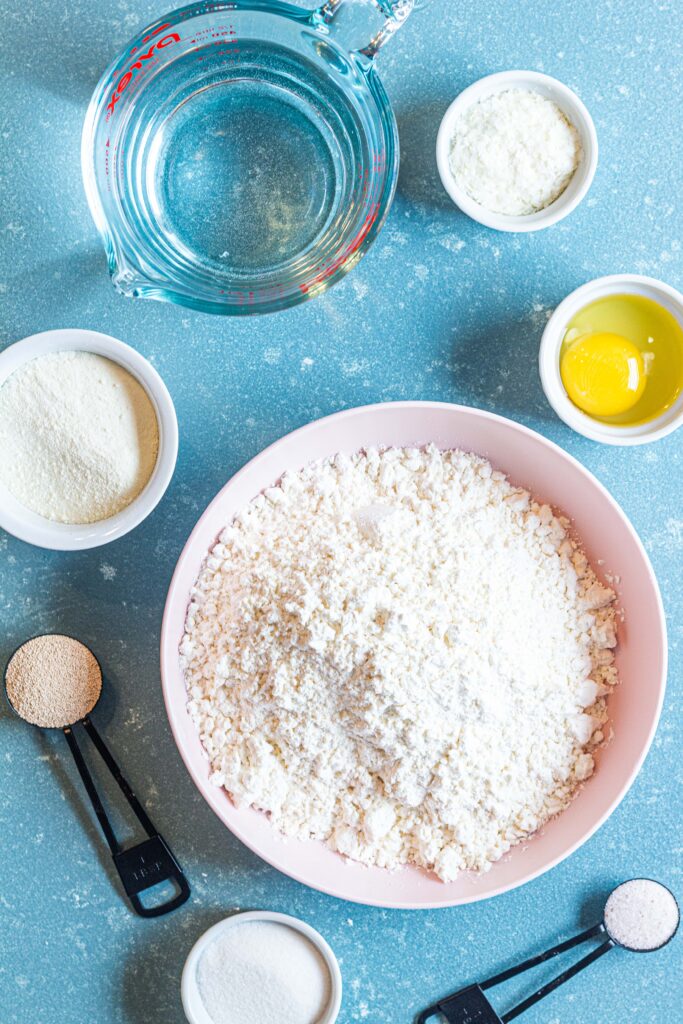
INGREDIENTS YOU'LL NEED TO MAKE GLUTEN FREE BREAD
High Quality Gluten-Free Flour
In gluten-free bread making, the flour you use has a huge impact on your end result. I highly recommend using my homemade blend or gf Jules for this recipe as it will give you the lightest, fluffiest bread.
Yeast
you can use instant yeast or active dry yeast. Be sure to check your labels because not all yeast is gluten-free!
Sugar
Yeast requires sugar in order to activate. You can substitute with honey if you prefer.
Salt
If you're on a low-sodium diet, feel free to reduce the salt used in this recipe by 50%
Potato Flakes
Also known as instant potatoes. This is optional but does help improve the texture of gluten-free bread. If you're allergic to potatoes, simply leave these out.
Powdered Milk
Also known as instant milk. Find it in the baking aisle near the canned milk. If you're dairy free, you can substitute powdered coconut milk or leave it out.
Egg
If you're avoiding eggs, you can use an egg substitute. I've had great results with Bob's Red Mill egg replacer.
Butter
Use room temperature butter. You can also use a butter substitute or olive oil if you're dairy-free.
Warm Water
It is important that your water is the right temperature. Too hot and it will kill the yeast, too cold and the yeast will have a hard time activating. The water should be around 110 degrees F which is a bit warmer than room temperature.
***Amounts and instructions can be found in the recipe card below
HOW TO MAKE GLUTEN FREE BREAD
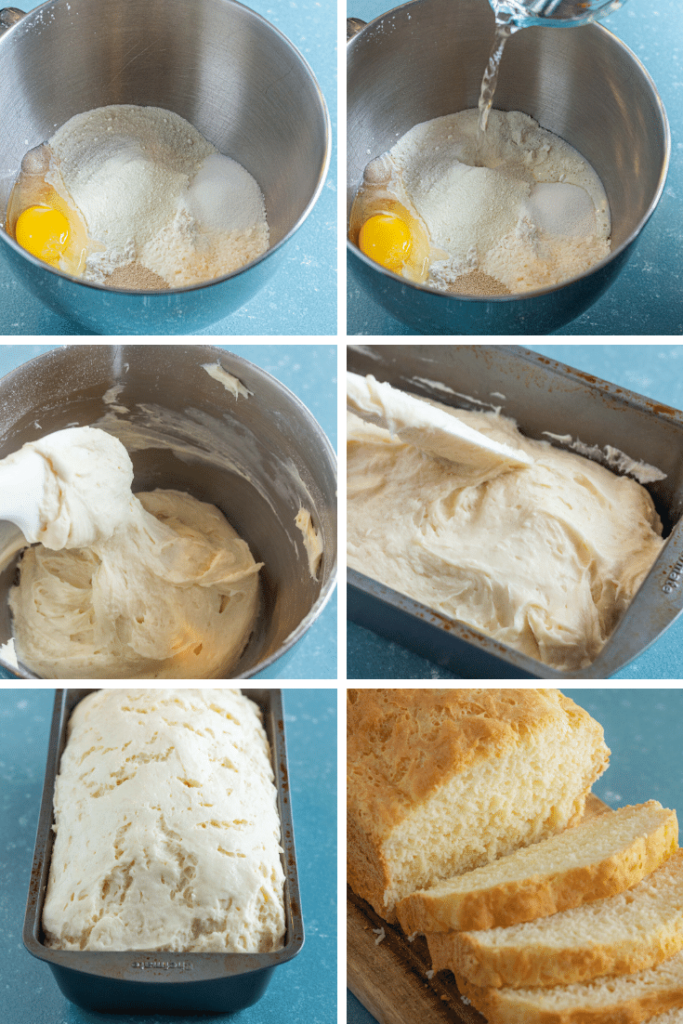
Bread making is an art, and baking gluten free bread is a different experience entirely, so I have included the step-by-step pictures and more detailed instructions below to walk you through the process.
If this is your first time making gluten free bread, you'll be surprised to learn that it's actually much easier than wheat bread! You'll measure the dry ingredients into a bowl, add the wet ingredients, mix with the paddle attachment of your stand mixer, shape, and let it rise once before baking.
There are a few important things to remember about gluten free yeast breads.
- There is no need for a second rise
- You don't have to knead the dough
- you want your "dough" to be more of a batter consistency. It's a little difficult to capture in a picture, but you can see that the dough is not thick enough to be shaped by hand, and is still quite sticky, similar to a thick banana bread batter.
This is such an easy recipe, you'll measure all ingredients into the bowl of a stand mixer (you can use a hand mixer, too), and mix for a few minutes with the paddle attachment.
Because your dough is soft and sticky, you don't need to use a dough hook and you will want to shape it in the pan. No worries, it will (magically) turn out just like any yeast bread would.
Be sure to grease your pan well because gluten free goods tend to stick a little more. Using a rubber spatula or wet hands, round the top.
Allow your dough to rise in a warm spot. I use the rapid proof setting on my oven.
Be sure to bake the bread thoroughly. If you under bake, the dough will have a poor texture and will sink after you take it out of the oven. Look for a nice golden brown color and bake for at least 50 minutes.
HOW TO STORE GLUTEN FREE BREAD
Like all fresh-baked breads, gf bread doesn't have a long shelf life and is best served the day you bake it. For best results, store your gluten free loaf at room temperature in a sealed bread bag for 1-2 days.
You can also freeze gluten-free bread for longer storage. I recommend slicing the loaf, then placing in a freezer bag. Be sure to remove as much air as possible.
When you are ready to enjoy a slice (or two), simply warm it in the microwave or pop in the toaster.
FREQUENTLY ASKED QUESTIONS
Why is Gluten-Free Bread so Dry?
There are a few reasons gluten-free bread can be dry.
- You may have used too much flour. To ensure you're measuring the correct amount of flour, use the stir, scoop, and level method.
- Using the wrong type of flour. There are lots of gluten-free flour options, and not all of them work well for breads! While Bob's Red Mill 1:1 is a popular option for gluten-free baking, it does not work well in gluten free bread. Be sure to use a gluten-free flour blend that is formulated for breads, such as my homemade blend or gfJules.
- Expecting gluten-free bread dough to be the same as regular bread dough. Gluten-free bread dough should be sticky, similar to a thick banana bread batter.
Does Gluten Free Bread Dough Need to Rise Twice?
Gluten free bread only needs to rise once and does not need to be kneaded.
What Should the Consistency of Gluten Free Bread Dough be?
Gluten-free bread dough should be sticky, similar to a thick banana bread batter.
My Gluten-Free Bread Rises, then Falls After Baking
If your gluten-free bread rises but then falls after baking, you might need to bake longer and/or add a little more flour to the dough.
How Can I Tell When Gluten-Free Bread is Done?
The best way to tell if gluten-free bread is done is by taking its temperature. The loaf should be around 210 degrees F and the crust should be a golden brown color.
Can You Knead Gluten-Free Dough?
Gluten free dough does not require kneading because it doesn't contain gluten. Instead, gluten-free bread dough is combined with a mixer, shaped, then allowed to rise once before baking.
My Gluten-Free Bread Didn't Rise at All
There are a few reasons your gluten-free bread dough didn't rise. The most obvious reason is that your yeast isn't fresh. To test your yeast, add 2 ¼ teaspoons yeast and 1 teaspoon sugar to ¼ cup warm water (about 100 degrees F).
Allow the yeast mixture to rest for 10 minutes. It should become bubbly and double in size. If this doesn't work, it's time to head to the store and get some fresh yeast.
Another reason your gluten-free dough didn't rise could be that you may have incorporated too much flour into the dough. The dough should be more like the consistency of a thick banana bread batter than a traditional dough and if it's too thick, it will not rise well.
Try placing your bread dough in a warm place such as on top of an oven that is turned on, or inside an oven with the proof setting.
Can I use a Bread Machine?
I have tested this recipe with a standard bread machine using a gluten-free setting and it definitely did not turn out as well as the oven method. Because this recipe is so easy with no kneading and only one rise, I feel like it's worth it to bake in the oven.
Is Gluten Free Bread Actually Healthier?
If you are eating a gluten free diet because you have celiac disease or another medical condition that requires it, then gluten-free bread is obviously the safe option and making your own is probably healthier than what you would buy in the store.
If you don't have a medical reason to eat gluten-free, than gluten free bread is actually not any more healthy. In fact, it can contain less nutrients and more simple carbohydrates because of the starches required to create a soft texture.
WAIT! Don't lose this post! Save this image on Pinterest
Making this recipe? Please leave a star rating! I love hearing from my readers and your reviews help more people find gluten-free recipes that actually taste good.
Connect with me on Instagram, Pinterest, and Facebook
We would love to see what you create! Snap a photo and tag @LifeAfterWheat on social media!
If you love this recipe, you might also like...
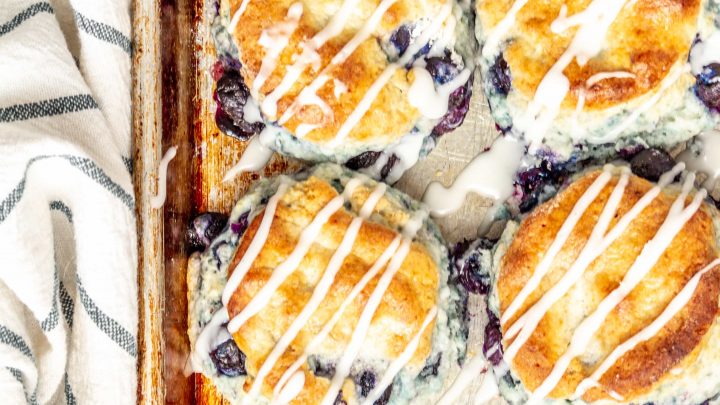
Blueberry Biscuits {gluten free}
Perfect for breakfast or brunch, these beautiful gluten free blueberry biscuits are perfectly light and fluffy, slightly sweet, and studded with blueberries.
THE BEST GLUTEN-FREE BREAD RECIPE

Gluten Free Bread
https://thereislifeafterwheat.comIngredients
- 3 cups High quality gluten free flour blend-I use my blend recipe in notes or gf Jules
- 1 tablespoon gluten free instant yeast
- 2 tablespoons sugar
- 1 teaspoon salt
- ½ cup instant milk powder
- 2 tablespoons instant potato flakes
- 1 egg
- 1 ¾ cup water slightly warmer than room temp
- 1 tablespoon butter softened
- 1 ½ teaspoon psyllium husk powder optional
Equipment
Method
- Measure flour by stirring the flour, scooping into measuring cup, and leveling with the flat end of a knife. Add all ingredients to bowl of stand mixer (you can also use a hand mixer) in order listed.
- Mix on medium speed for 3 minutes. It should be the consistency of a thick and sticky batter, like a banana bread that has too much flour. Add additional water or flour 1 T at a time if needed to attain this consistency. Refer to the photos in the post to see what the consistency should look like.
- Grease bottom and corners of a loaf pan. I use butter.
- Spread batter in loaf pan, peaking the middle a bit lengthwise instead of spreading flat.
- Cover lightly with plastic wrap sprayed with cooking spray or oil and let the bread rise in a warm place until loaf has almost doubled in size. I use the rapid proof option on my oven and it takes about 25 minutes.
- Preheat to 350°.
- Bake for 45-50 minutes, until bread looks firm and is a nice deep golden brown on top. If you take it out too early, it will fall as it is cooling.
- Brush the top with butter.
- Let the bread cool for 10 minutes in pan.
- Invert onto a cooling rack and allow to cool completely before slicing.
- Be sure to enjoy it fresh! It is best this way.
- The best way to store gluten free bread is to slice, place in a Ziploc freezer bag, remove all the air, seal, and freeze. You can then remove a slice and pop it in the toaster or microwave as you need. It might help to put pieces of wax or parchment paper between the slices so they don't stick together.
- Once you have frozen the bread, it's best toasted or warmed in the microwave for 10-15 seconds. I don't recommend refrigeration as the bread tends to crumble easily.
Nutrition
Notes
- I recommend using gf Jules gluten free flour or my blend in this recipe.
- When measuring flour, always stir, scoop into your measuring cup, and level off.
- The psyllium husk powder is optional, but aids in elasticity of the dough and bread.
- For dairy free, use olive oil or a dairy-free butter substitute and powdered coconut milk (or omit the powdered milk)
- for egg-free, use an egg replacer. I love Bob's Red Mill egg replacer for this recipe.
- Yeast needs sugar in order to activate, so don't leave it out. You can use honey if you prefer.
- If you can't tolerate potato flakes, simply leave them out.
1 cup brown rice flour, sorghum flour, or a combination of the two (I usually use half and half)
⅔ cups potato starch (not potato flour)
⅔ cups tapioca starch (also called tapioca flour)
1 tablespoon xanthan gum (you can substitute guar gum but it doesn't work quite as well) Directions: whisk together in a large bowl.
Mark H says
Your recipe calls for 1T butter, is this for brushing on the loaf or is it added with the rest of the ingredients? I had the same question with the dinner roll recipe as well. Thx!
Celeste Noland says
The butter is for the dough, but I recommend extra for brushing on top after removing the bread/rolls from the oven 🙂
Beate says
I dont want to use Milk Powder, But I dont quite understand how to adjust the recipe? Just omit it? Wont be something Missing for the right consistency? Thank you!
Celeste Noland says
Great question-you can use coconut milk powder! Most groceries sell it right next to the regular milk powder. You can omit if needed, but it helps with flavor texture a bit!
Elle says
I didn't have powdered milk so I just used whole milk in place of the water called for in this recipe. My bread turned out great!
Sarah says
Is there a way to get the full recipe of this again? I really liked it and now it doesn't have all the ingredients! Super sad I can't bake my bread loaf this week now 😢
Celeste Noland says
I'm so sorry, I'm not sure what happened! I have added everything back in.
Deb says
I just came across this recipe and it looks amazing, but in the recipe itself it only shows the flour and yeast, the other ingredients and their amounts are now shown. Am I missing something?
Celeste Noland says
I am so sorry, I have no idea what happened! I just added everything else back in.
Dian Simpson says
What size pan is best for this recipe?
Celeste Noland says
I link my favorite pans in the post, but the dimensions of a standard loaf pan (which I use most often) are 8.5 x 4.5 x 2.75
Suzanne says
e psyllium husk powder Is not listed in the ingredients, it’s only in the notes at the bottom. How much should you use? At what point is it added?
Thanks,
Suzanne
Celeste Noland says
Sorry about that Suzanne, I fixed it! You'll add 1 1/2 teaspoons along with all the other ingredients.
Susan says
I LOVE your bread recipe!! The only problem I have is when I cut into it it is gummy. So I freeze and toast it and it’s delicious. What am I doing wrong???
Celeste Noland says
Do you allow it to cool completely before slicing?
Kristen says
I’m eager to try this. Wondering how long this could be stored in the fridge? We have four kids and go through a lot of bread, but I see this only lasts 1-2 days. That’s a lot of baking over here then!
Celeste Noland says
Whatever we won't use in a day or two, we pop in the freezer. I like to slice first, then freeze. Placing pieces of parchment between each slice makes them easy to separate, then you can just pull out what you need and pop it in the microwave or toaster.
Chris says
Love your recipe, texture and taste was great, had one problem, when I took the bread out of the oven and removed from the pan the bottom half shrunk and didn’t cook as well as the top, I used your flour blend and all ingredients that were listed, I did use a stone ware pan,could this have made a difference?I will try again, baked for 45 minutes!
Celeste Noland says
The pan could have affected it, I've never used a stoneware pan. You could also try baking another 5-10 minutes.
Nicole Stephenson says
I'm excited to try this recipe! I am sensitive to potatoes as well though, is there a substitute I could use for the potato flakes?
Thanks for sharing this wonderful recipe!
Celeste Noland says
You can just leave them out 🙂
Gina D says
The bread comes out nice and soft, but a little too airy with bigger holes. Is there a suggestion on what adjustment I can make?
Celeste Noland says
They could be rising too quickly, or too much.
Bill says
Awesome recipe. DIL and wife love this. I use King Arthur's GF and have had zero issues. Did find my two 2 cup liquid measuring cups are off! Weigh the water. 415 grams of water is 1& 3/4 cups. Cutting then freezing is key! Thanks!
Elle says
Big holes on baked bread means you over-proofed it. Baking bread is a learned art by trial and error.
Leanne says
This is the best gluten free bread ever, bar none!!!
You were almost right when you said it tastes like regular bread,
It actually tastes so much better.
Thanks for the amazing recipe.
Synnove Inman says
Do I use the gf Jules all purpose flour or the bread mix? Any particular brand of psyllium husk powder? Hubby is celiac and I have not been able to make gluten free bread. I have tried everything from potato flake sourdough starters, mixes, etc... the store bought bread is just gross!! Please help!!
Celeste Noland says
Use gfJules app purpose flour, it's magic! any brand will work, just be sure it's powder and not whole psyllium husks. Also, have you checked out my cookbook? I think it would be super helpful for you!
Lovelace Frances says
Recipe for making the flour blend doesn’t equal to 3 cups that are needed for the recipe for the bread.
Celeste Noland says
It does come out to about that much, but you can always double it, too!
Kim says
I have used this bread recipe for almost 3 yrs, using GfJules flour. I have customers who order 4 loaves at a time. I make it for myself as well for my sandwiches. It is the softest gf bread I have ever had in my 7yrs of being gf. Try the recipe, you wont be disappointed!
Celeste Noland says
Kim I love this! Thank you so much for sharing.
Elle says
Using your flour blend found in the notes this bread tastes great and does have a great crumb, but only the ends of the bread because I kept having trouble with the middle collapsing and being very gummy. I fixed this issue by lowering the xanthan gum to 2 teaspoons. Now the middle of the bread does not collapse and has the same great texture as the ends of the bread. With this one tweak this has turned into my go-to bread recipe. Very delicious!!